Free Open Source embedded C/C++ software development with Eclipse
Eclipse is an Open Source IDE that has became the facto in the embedded software development realm. It is a very complex and ultra customizable IDE. You can pretty much make it do whatever you like by creating plugins and templates. Many people have already created plugins for different type of MCUs such as AVR, MSP430, 8051, ARM, etc... Any processor that GCC compiler can compile, there is a good chance that it would work with Eclipse. In this post, I will try to gather as much information and pointer as I could to setup an Eclipse environment. I will concentrate more on OSX as it is my OS of choice for daily use and also my development platform.
Embedded software development requires three things: the compiler, the editor or IDE and the debugging tools a JTag. Compiler and IDE are free open source. The JTag tool, you'll need to buy the one for the MCU you are developing.
Important notes for OSX users
Since the update of Catalina, there is a new security measure that blocks the execution of command line tools such as the GCC compiler and OpenOCD and other downloaded executables. First thing, open System Preferences/Security & Privacy/Privacy. Select 'Developer Tools'. Then add eclipse to the list.Eclipse CDT IDE
Let first download and install Eclipse for your developement environment OSX, Linux or Windows. Follow this link to download. This is the current version as of this writing. I will try to keep most updated as possible. Click the link bellow to Eclipse download page then select Eclipse IDE for C/C++.
http://www.eclipse.org/downloads/packages/
OSX version is in .gz format. All you need to do is decompress it by double clicking on it. Then move the whole thing to wherever you want. I moved mine to /Developer/Applications then add Eclipse to the Dock. Once your Eclipse is installed find the links bellow to install the development tools and plugins for the embedded processor you want to work with. You can have multiple instant of Eclipse on the same computer. This means you can have one setup for ARM development and an other for MSP430 for example or you can also have both in the same Eclipse. The choice is yours to make.
Starting from Eclipse Oxygen requires Java 8 or above. Download it here
http://www.oracle.com/technetwork/java/javase/downloads/jdk8-downloads-2133151.html
ARM Processor
Start Eclipse and select the default workspace. Once Eclipse is started, select the menu 'Help/Eclipse Marketplace'. A popup will appears. Type 'arm' in the search box and install the 'GNU MCU Eclipse ...'
The GCC Compiler for ARM can be found here https://developer.arm.com/open-source/gnu-toolchain/gnu-rm/downloads. This site is maintained by ARM though it is the most active and up to date GCC compiler for ARM. There is no installation package for OSX version. It is only available in bzip2 format.
The best ARM Eclipse plugins I found is from here https://gnu-mcu-eclipse.github.io. There are substantial information on how to install and setup the plugins with JLink & OpenOCD for debugging. I have tested this with NXP LPC, NRF5x, Freescale K series, CC3200 on MAC OSX. It works fine with both processor using the same Eclipse. Debugging tested with J-Link and IDAP-Link on OS X, Windows & Linux. The IDAP-Link is the low cost CMSIS-DAP Jtag for debugging and mBed(ing) your boards.
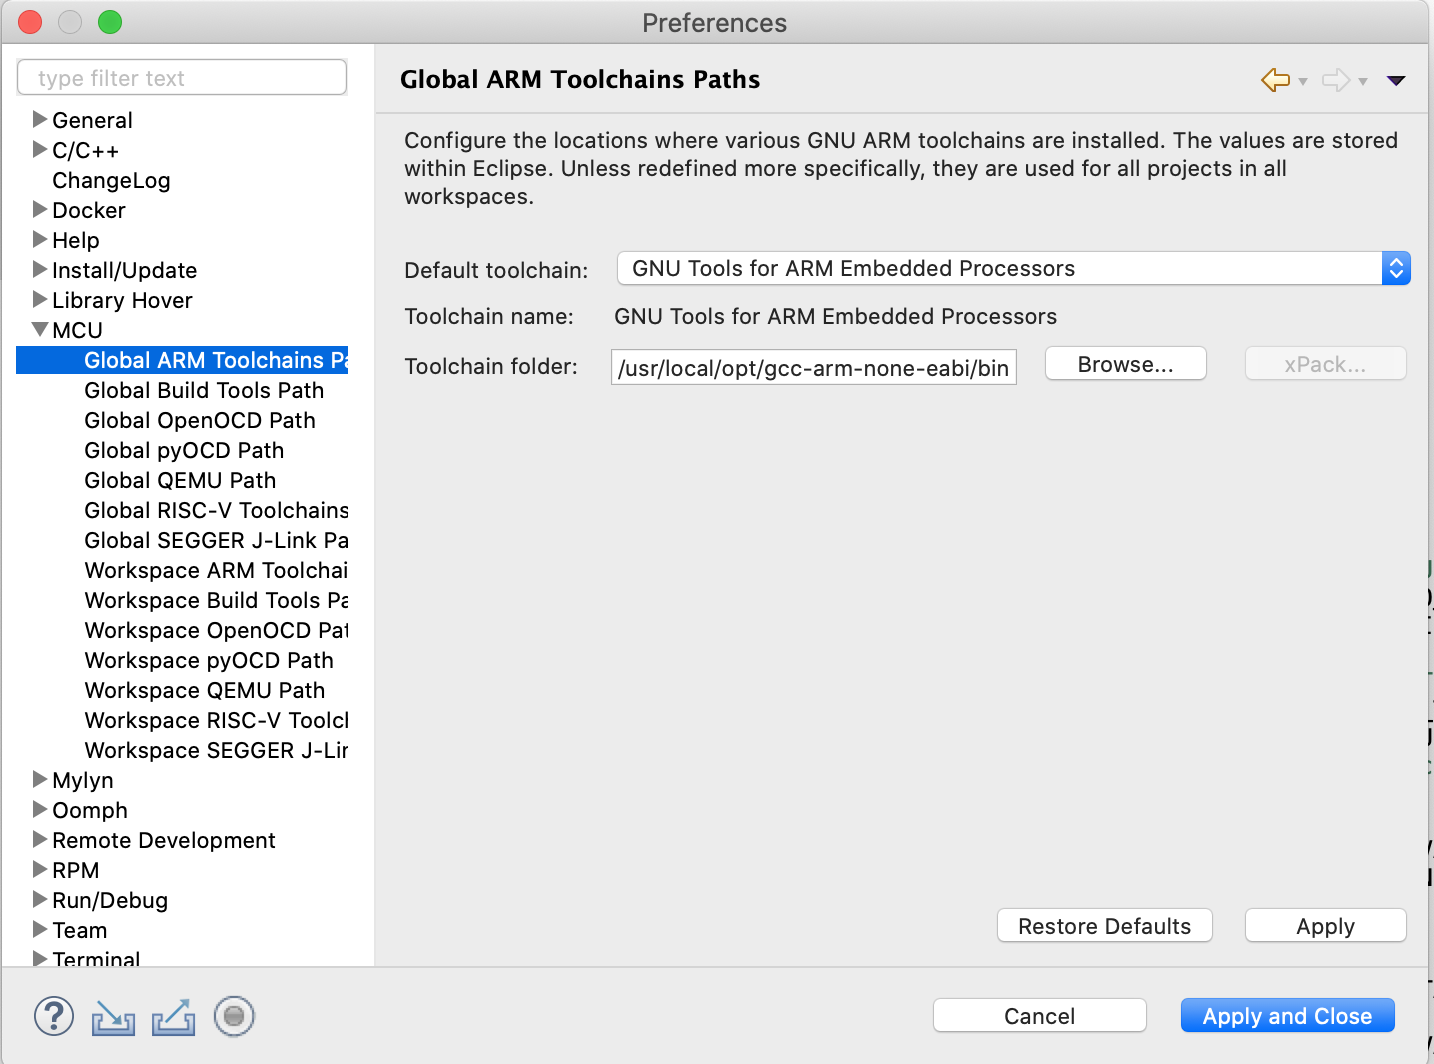
Once the plugins, GCC and OpenOCD are installed. Goto the Eclipse Preference to set the path for them in the Global...
The Eclipse project wizard by default creates project with setting for Cortex-M3. You will need to manually change it via project settings. See details project creation for each processor on its own page of this blog.
See my EHAL page for source code and example projects for multi-platforn. All projects are Eclipse IDE projects, no makefiles. Full source code exemple for nRF51 Blinky & Blinky over BLE custom service projects are available on the page.
Eclipse with CC3200 is now working with TI LaunchXL OpenOCD Ftdi, see CC3200 page.
MSP430 Processor
GCC Compiler and Eclipse Plugins can be found here. Works on MAC OSX as well with same Eclipse I used with ARM. I have not yet test debugging. Compiler work well.
JTag Debugging with Eclipse
The Eclipse plugins above supports J-Link & OnpenOCD for hardware debugging. Once you have successfully compiled an embedded project, you'll need to create a debugging configuration for your project. It is not created by default. To create a new debugging configuration, select your project the select the menu 'Run' from the menu bar. From the drop down menu, select debug configuration. A popup window will appear as below.

On the left hand side, there are many type of debug configurations. Only 2 are of interests the GDB SEGGER J-Link and the GDB OpenOCD. Selected the one you want to use and create a new configuration of that type. Once the new configuration is created, go through all tabs to customize for the target project & MCU. J-Link requires setting target MCU in the debugger tab. OpenOCD require setting the appropriate .cfg files. See IDAP-Link page for more details on OpenOCD debug settings.
This post is so helfull and inforamtive .keep updating more information...
ReplyDeleteCareer In Android Development
Android Devlopers